

The first stage of repairs begins on the broken rifles of these unidentified steel helmet Tommies.
The interesting background story to how I acquired these and other ‘waifs and strays’ can be found here: https://manoftinblogtwo.wordpress.com/2021/10/09/repairing-vintage-toy-soldiers-1-waifs-and-strays/
The broken rifle end is filed flat to give as good a face to carefully and slowly hand drill out a hole using a pin vice to fit the new wire barrel.
A new barrel piece is cut and inserted into the filed hole, secured with a small dob of superglue. The rifle ends will be trimmed to length once the glue has securely dried.
This is the kind of slow finicky handiwork that I enjoy (when it goes well).
Thickening of the wire insert to match the rest of the barrels with masking tape is the next step, followed by painting in a dark brown acrylic to match the original remaining rifle paintwork.

Basing and letters
As some of the bases are damaged or miscast, leading to figures toppling over, I glued them to MDF tuppeny bases. I shall match paint from the MDF base colour to the original as best I can.
Whilst doing this, I noticed some tiny top of base lettering.
These riflemen are possibly pictured in the ‘unidentified makers’ section in Norman Joplin’s Great Book of HollowCast Figures, same stance, albeit pictured in Joplin with a rounder base and no white belt.
They have no discernible maker’s mark on the underside of the base.
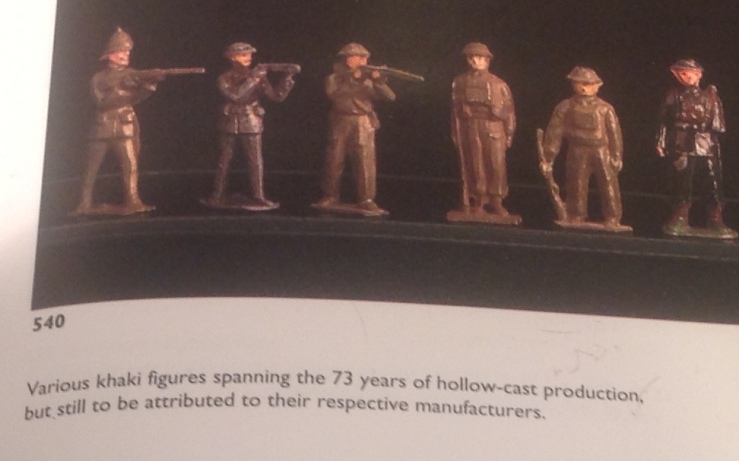
Only a faint trace of tiny lettering ‘de’ and ‘nd’ can be seen front and back around their feet. ‘Made in England’ perhaps? A common enough base marking.
‘Steel helmet riflemen standing firing’ is a common enough figure. What helped to avoid identifying them as any of the known makers is that they have no puttees, instead they are wearing trousers. This may suggest a post WW1 date.
The other figures
Paul Watson kindly suggested an ID of the prone figure as a Taylor and Barrett stick grenade thrower. This checks out in Joplin as c. 1930. He makes a good enough crew member for the machine gun team.
The kneeling machine gunner feels solid and possibly home-cast. It is a common enough pose.
The Britain’s Tommy Gunner is intact, just battered and playworn. A common enough figure from Set 1898. He feels different, has none of the usual Britain’s base markings or hollowcast pouring holes on base or helmet, so is probably one of the Britain’s postwar 1950s experiments in using techniques and metals other than lead such as mazak.
I have marked the underside of the MDF base as ‘waif and stray rifles’ so their jumble(d) origins remains clear.
These figures, once repaired, should fit snugly into a mixed and motley khaki-clad steel helmeted unit of Home Guard or similar.
I shall post a picture of these figures once repairs are completed.
Blog posted by Mark Man of TIN, 14 /15 October 2021

Coming along very nicely. I have the stick grenade figure, with his grenade intact l recall. It is interesting to see what method you employ to replace rifle barrels. I have an unnatural fear of metal filings, probably stemming from over zealous reading of notices outside scanning machine rooms, so am reluctant to drill metal. I often just stick on a bit of cocktail stick or sometimes wire, secure with glue and build up/ strengthen with masking tape. I have also used the top of map pins or a bead to replace hand grenades. I look forward to seeing these in action…
LikeLike
Thanks. I am very careful when working with old lead, careful cleaning of the work surface, filing into sheets of paper (with a centre fold in them) to help catch the fine filings, regular hand washing, face mask and PPE plastic gloves if needed.
I quite like the fiddly work.
I save most of the filings in a small plastic tub to sprinkle a pinch into the home casting ladle to add a bit of old lead toy soldier DNA.
LikeLike
Interesting short video blog on hobby safety from Big Lees Military Adventures ( who also has a Norseman exhibition blog post)
http://www.blmablog.com/2021/10/hobbying-safely.html?fbclid=IwAR3PaXpOMRgXprXR5DFjUBSgHb2JK65-YiEZdMOHRSqNsS0Q_M8RPI8Dric
LikeLike
Sorry, misread, it’s a Nero exhibition blogpost – not a Norseman in sight!
LikeLike
Hi Mark.
I too am intrigued by your rifle repair methods. I use a similar method to add wheels (drawing pins) to my artillery pieces but I only drill the matchsticks I use for axles. However my question is about the use of masking tape. I imagine fitting bits of masking tape to the wires must be the height of fiddlyness. Any tips ??? Also does the masking tape not dry out and crack over time ??? or do you treat it somehow, maybe soaking in superglue ??? Regards Tony
LikeLike
Yes, fiddly.
I often put a tiny sticky trace of superglue along the wire first, then build up one or two layers of a masking tape tight to the wire.
Once happy with the thickness and shape, I seal it with superglue
When dry later, I paint several coats of acrylic, followed eventually by varnish as needed.
LikeLike
Good work, sir. They look completely ready for action. I have new levels of admiration for your abilities given my own recent attempts with the little hand drill. I feel hopelessly out of my depth but, very slowly, I’m starting to be a bit less useless with it.
LikeLike
Thanks Marvin. Still some tape and glue and paintwork to do.
Practice, practice, practice with the pin drill …
LikeLiked by 1 person
At least my swearing count is coming down at any rate as practice continues.
LikeLike